Fall into pumpkin

October is more than half done and I’m moving ever more swiftly into fall. Late summer has faded. My small flower bed is cleaned and tucked away under fresh bark chips to wait out the months till spring. Pumpkins and gourds are the centerpiece for my dining room table, and my taste has turned to hearty foods. Sweaters have come out of storage and back into my drawers. Flannel sheets are on my bed.
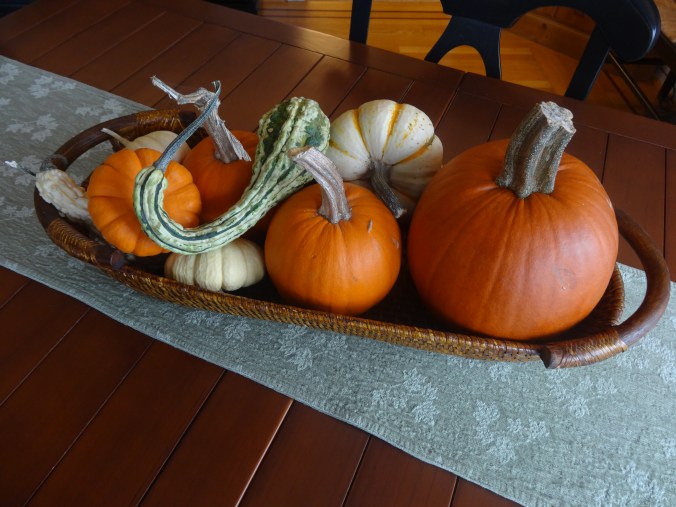
Pumpkins!

Pumpkins!

The light fades pretty quickly this far north. Just a few weeks ago the sun rose way too early. Now it’s tempting to stay snuggled in past the call of my alarm. It’s so dark out at 5:00 am. Definitely not time to get up.

In honor of the month, and the iconic pumpkin, in all its orange glory, I’m celebrating the color in food.

“I’m so glad I live in a world where there are Octobers.” ~ L.M. Montgomery, Anne of Green Gables

I was late to appreciate the value of squash in my life. I grew up with yellow squash and zucchini, as a Southern girl should. But other varieties did not grace my mother’s table. Gradually, curiosity overcame timidity, and I began buying unknown squashes to see what I might be missing. I tried acorn and butternut and spaghetti, the deep greens and variegated and lemon yellows adding a charming and rustic touch to my kitchen display, the squashes doing double duty, first as still life, and then, after a run in the oven, making a second appearance as star of dinner.

The focus of this post is butternut. It’s the right color (!) and one medium size squash makes a lovely pot of soup, enough to serve six people with normal appetites, or four quite hungry people, or one or two ravenous souls.

I began, as much of my recipe searching does these days, by scouring the internet to see what’s out there already. I had an autumn squash soup recently at Panera‘s, and it inspired me to create my own version, since the closest Panera’s is in Seattle, an expensive flight away from Ketchikan. I found several knock-off recipes. The one I chose is good, but different than the one I had at the restaurant…not as thick, and not quite as sweet. But of course you can easily adjust to your own taste. I would bet the Panera soup includes a touch of sugar, and probably has a roux base. This soup is just a hearty rendition of squash, onion, seasonings, broth, and cream. It’s tasty and couldn’t be easier. And my favorite thing is that it needs to simmer on the stove….a perfect fall afternoon activity! I put my soup on and just come back to check it now and then.

Butternut Squash Soup

2 tablespoons unsalted butter
1 small onion, diced
1 tablespoon fresh rosemary (1 teaspoon dried)
1 small butternut squash, peeled and chopped
6 1/3 cups chicken stock (50.4 ounces)
1 1/4 cups heavy cream (or use half and half, or milk)
1 teaspoon salt
1/2 teaspoon white pepper
1/2 cup chopped walnuts
Hot pepper sauce to taste

Melt butter over moderate heat in large saucepan. Add the onion and rosemary and cook until soft (approximately 5 minutes).

Add chopped squash, chicken stock, heavy cream, salt, white pepper and hot sauce. Reduce heat and cover. Simmer for approximately 2 hours – or until squash is tender.

Chop and peel the butternut

Chop and peel the butternut

Rough chop, all the good stuff

Rough chop, all the good stuff

Use blender (or immersion hand blender) to puree the hot soup. Toast walnuts to use for garnish. 

Taste of fall in a cream soup

Taste of fall in a cream soup

Note: you can puree the soup to a creamy consistency, or blend minimally  for a more rustic dish. (I used an immersion blender. This makes the job much easier than pouring hot soup into a blender. If you don’t have an immersion blender, I highly recommend buying one; you’ll find lots of uses for it to justify space in your kitchen.)

Soup in a crock

Soup in a crock

Serve with a hearty bread or grilled cheese. Mmmmm!

In keeping with my orange theme, I tried another recipe this week, this one a no-bake pumpkin dessert.

No Bake Pumpkin Cheesecake

Dessert in a glass!

Dessert in a glass!

For the crust 

1 sleeve graham crackers (about 9 crackers)
½ stick (4 tablespoons) butter, melted
2 tablespoons sugar
2 tablespoons brown sugar

For the filling 

1 8-ounce package cream cheese, softened to room temperature
1 15-ounce can pumpkin puree
3 teaspoons pumpkin pie spice
1 3.4 ounce package vanilla flavored instant pudding mix
1 14-ounce can sweetened condensed milk
Whipped cream, (in place of 12 oz container of Cool Whip) how to make your own whipped cream here 

Instructions

Place the graham crackers in the bowl of a food processor and pulse the crackers into fine crumbs. Add the melted butter, sugar and brown sugar and pulse until combined.

Spoon the crumbs into individual dishes for serving. Place in the refrigerator to set while you are preparing the filling.

In the bowl of a stand mixer with the paddle attachment, beat the cream cheese until light and creamy.

Add the pumpkin, pumpkin pie spice, and pudding mix and beat until completely mixed, scraping down the sides and bottom of the bowl to ensure that all ingredients are well combined.

Add the sweetened condensed milk and mix again until well combined.

Change your stand mixture attachment to the wire whisk. On slow speed, fold in whipped cream until well combined.

Allow the mixture to sit in the fridge for about an hour to firm up.

Using a large pastry bag with a large tip, or a spoon, top the graham cracker crust in each dish with the pumpkin mixture and refrigerate until ready to serve.

Garnish with additional whipped topping if desired.

Note: Feel free to use Cool Whip…I prefer real cream, and it holds up well. I find that this is one area that I’m a bit of a food snob. Notice I’m perfectly happy to use a pudding mix for this recipe. If you really want to be a purist, you could make a recipe of homemade vanilla pudding and use that in place of the instant mix. I might try that next time, but it was a busy day, and I had a mix in the pantry, so I was content to go with that.

I couldn’t resist trying this little treat. Any recipe that combines cream cheese and sweetened condensed milk is not to be missed. And this one is delicious.

I will also admit…an astonishing amount of the filling did not make it to the finished dessert. I tasted my way through a couple of servings, and will be required (!) to put in an extra session or two at the gym to offset my calorie intake for the day. But this is a price I’m willing to pay to enjoy a yummy treat and still be able to wear the new jeans I just bought 🙂

Happy stirring, tasting, and nesting!

Oatmeal for breakfast; or, I have to lower my cholesterol

High cholesterol treatment

Was there really any doubt? About five years ago when I last had my cholesterol checked, my number was good…don’t remember the exact number, but it was good. And the most recent reading? A disappointing 251, in the “high” category, although the HDL (good cholesterol) number is excellent.  The cream-in-my-coffee habit has caught up with me. I’m expecting the lipid police at my door any moment.

So: resolutions begin. I’ll add oatmeal to my coffee habit. I can’t give up the cream so I’ll have to find ways to minimize the impact. I suppose I’ll have to increase my exercising too. Hey, I already drink red wine, so I’ve got that going for me. What else? I’m not a big meat eater, so I can’t help myself by giving up something I already don’t do. You followed that, right?

Why is it that I can manage my weight and stay in the same size clothes I’ve worn my whole adult life, and yet this one little test can threaten my love affair with dairy products? I wouldn’t say I’m addicted. But it would be a grim world, mornings at 5:oo am at my house, without the promise of hot coffee diluted with cream until it’s a beautiful khaki color. And don’t even get me started on butter. I don’t eat too much of it these days. I don’t bake a lot, and most of what I bake I give away. I don’t cook a lot in general. But if a recipe calls for butter, that’s what I use. I can’t do margarine or other plastic products passing themselves off as dairy. I’m in the camp of “I’d rather have a small amount of the real thing than a lot of imitation.”

Hmmm….Paula Deen, where are you? And I wonder what your cholesterol number is? I notice you don’t offer full disclosure on your Food Network programs. Think I’ll have to rewrite that old rhyme: “Butter, butter, everywhere, and not a bite to eat.”

Well, as it turns out, I like oatmeal, so that won’t be too difficult to add. I don’t eat it often, but I like it. And I especially like it with brown sugar, a pat of butter, and just a splash of cream. Uh oh….

See you at the gym!

Perfect Biscuits; or, how to follow directions

Southern Living Buttermilk Biscuits

I grew up in the South. I had grandmothers who cooked; a mom, aunts, cousins, a mother-in-law who are all stars in the kitchen. And I don’t do too badly myself, in some areas. But I’ve always been defeated by biscuits. I know, they’re such a Southern staple…tragic that I couldn’t produce a successful version of that breakfast icon.

Over the years I’ve collected a variety of recipes, each promising to be the best, the fluffiest, the epitome of biscuitness. And every time I’ve tried a new recipe, I’ve had another disappointment.

Last weekend I was doing a little internet surfing and stumbled across a classic Southern Living recipe for buttermilk biscuits. The photos looked so amazing, I decided to give it one more try. And I produced perfection! I’ve probably even made this recipe, or something very similar, before. So what was the variable this time? Well, for the first time ever, I baked the biscuits at the temperature the recipe specified! I know right now you’re thinking, why would you not bake at the temperature the recipe gives?

I like lightly browned breads, nothing too crisp or crusty. So I’ve always baked at a lower temperature, thinking that would keep my biscuits from browning too much. But when I actually baked them at 450 degrees, they puffed up to an amazing height. To my surprise, they were lightly browned on the exterior and were the perfect pillowy texture on the inside.

There are times that it is good to think outside the box. There are times when it is good to make your own rules, to do what works for you. But there are also times when following the rules pays off. You don’t need to reinvent the wheel for some things. Biscuit recipes work as they’re written. Math works according to known formulas. Sometimes the best course is to see what has worked for others and to copy what has been successful. That doesn’t mean you don’t have creativity or ability to be original. It may mean that you are smart enough and humble enough to recognize that others may know a thing or two. That you may not always have the best answer, the best idea.

The trick is to know what strategy to use for the given situation. From now on, if I’m making biscuits, I’m going to trust the recipe and “bake as directed.” How many times I’ve read that instruction, and how frequently I have not baked as directed! And what else have I mis-managed because I didn’t follow the directions? On the other hand, there are situations in life that demand that I listen to my heart, that I follow my instincts.

Maybe that’s the challenge for each of us…when to conform and when to stand up and follow our on path. I don’t have all the answers. A lot of the big questions of life are complex, and there may not even be one “right” answer for some things. But I’ve learned that’s not the case for baking biscuits. It’s good to follow the recipe. It’s good to follow directions.

Perfect Southern Living Biscuits

Ingredients

  • 1/2 cup cold butter
  • 2 1/4 cups self-rising soft-wheat flour
  • 1 1/4 cups buttermilk
  • Self-rising soft-wheat flour
  • 2 tablespoons melted butter

Preparation

  • 1. Cut butter with a sharp knife or pastry blender into 1/4-inch-thick slices. Sprinkle butter slices over flour in a large bowl. Toss butter with flour. Cut butter into flour with a pastry blender until crumbly and mixture resembles small peas. Cover and chill 10 minutes. Add buttermilk, stirring just until dry ingredients are moistened.
  • 2. Turn dough out onto a lightly floured surface; knead 3 or 4 times, gradually adding additional flour as needed. With floured hands, press or pat dough into a 3/4-inch-thick rectangle (about 9 x 5 inches). Sprinkle top of dough with additional flour. Fold dough over onto itself in 3 sections, starting with 1 short end. (Fold dough rectangle as if folding a letter-size piece of paper.) Repeat entire process 2 more times, beginning with pressing into a 3/4-inch-thick dough rectangle (about 9 x 5 inches).
  • 3. Press or pat dough to 1/2-inch thickness on a lightly floured surface; cut with a 2-inch round cutter, and place, side by side, on a parchment paper-lined or lightly greased jelly-roll pan. (Dough rounds should touch.)
  • 4. Bake at 450° for 13 to 15 minutes or until lightly browned. Remove from oven; brush with 2 Tbsp. melted butter.

Enjoy! And don’t under-bake!

English Sticky Toffee Pudding

Sticky toffee pudding

Yum! Sticky Toffee Pudding

Recipe of the Week

Ok, I don’t really post a weekly recipe, but it sounds good, doesn’t it?

This recipe came to me from a dear friend, Ann, who is a wonderful cook of Southern heritage (no disrespect to other regions of the US, but I must say, all the Southern cooks I know are skilled and accomplished in the kitchen). Ann is a shining star in that area, and she has been a source of many family favorites through the years of our friendship. My famous cinnamon rolls (famous among my friends) are really Ann’s…and I am always happy to give credit to her.

But cinnamon rolls are for another day. Today’s little jewel is Sticky Toffee Pudding, possibly my favorite dessert in the world next to decadent chocolate cake. And there’s a secret ingredient: dates! Don’t be put off by that if you’re not a date fan. They dissolve beautifully. Make a game of asking family or guests what fruit is in the pudding. My bet is that no one will even know there’s fruit in the dessert, much less guess what it is.

The first thing to know about this dessert is that it is not a pudding. This is a recipe of English origin, and the English seem to label many things “pudding” that would not be a pudding to an American…just a little clarification going in so no one is surprised by the result. But believe me, you won’t be sorry this is not the traditional American pudding…just ignore the name and proceed as directed. This is a moist and delicious cake with the best and easiest-to-make caramel sauce I’ve ever had. In fact, the sauce alone is worth making. I use it for other desserts that need a little extra love in the form of gooey-buttery-brown sugar decadence. It keeps well in the fridge and reheats like a charm. And it dresses up anything, from a plain pound cake to a bowl of fresh fruit; perfect for ice cream too. Thank you, Ann!

Sticky Toffee Pudding

Pudding Ingredients:

  1. 1 cup plus 1 Tbsp all-purpose flour
  2. 1 tsp baking powder
  3. ¾ cup chopped pitted dates
  4. 1 ¼ cup boiling water
  5. 1 tsp baking soda
  6. ¼ cup unsalted butter, softened
  7. ¾ cup granulated sugar
  8. 1 large egg, lightly beaten
  9. 1 tsp vanilla

Toffee Sauce Ingredients:

  1. ½ cup unsalted butter
  2. ½ cup heavy cream
  3. 1 cup packed light brown sugar

Topping:

1 cup heavy cream, whipped

Directions for pudding:

Preheat oven to 350 degrees. Butter an 8 or 9 inch round cake pan, or square baking dish of similar size. Sift flour and baking powder together and set aside. Finely chop dates if you purchased whole dates. (You can purchase these pitted and whole, or already chopped, either option works.) Place dates in a bowl and add the boiling water and baking soda. Set aside.

In bowl of electric mixer, beat butter and sugar until light and fluffy. Add the egg and vanilla and blend into butter/sugar. Gradually blend in the flour mixture. Gently fold date mixture into the batter, and pour into the prepared baking dish. Bake until the pudding is set and firm on top, about 35 minutes. Remove from oven to wire rack. Cool in pan.

Directions for sauce:

Combine the butter, ½ cup of heavy cream, and the brown sugar in a small heavy saucepan. Heat mixture to boiling, stirring constantly. Boil over medium heat until mixture is thickened, about 8 minutes.

To serve:

Preheat oven broiler. Spoon about 1/3 cup of the sauce over the pudding and spread evenly over the top. Place pudding under the broiler until the topping is bubbly, about 1 minute. Portion pudding into dessert dishes, drizzle with additional toffee sauce and top with a spoonful of whipped cream.

Delicious!

Favorite things

Riley photos

 AND

  • Berry wreaths
  • Clear glass vases or jars, especially with something interesting filling them
  • Tiny white Christmas lights, used year round as backlighting
  • Bread fresh from the oven, lots of butter
  • Anything from Pottery Barn
  • Cooking magazines
  • Traveling anywhere with Rob
  • A quirky sense of humor
  • Sentimental anything….music, movies, commercials, cards
  • Quaint towns that make me think “I could live here!”
  • Warmth
  • Soft gingerbread cookies
  • The shared look between lovers that tells each of you that you know the other’s thought
  • The fragrance of home baking – anything from the fall…apples, pumpkin, spices, all those comforting aromas
  • Beautiful beaches
  • Frank Sinatra’s music
  • King crab legs cracked open by my husband and dipped in melted butter…heavenly!
  • Cranberry colored paint on walls with white trim
  • Family photos
  • Cilantro, basil, and rosemary…fresh herbs in salads and soups

Best Fudgy Brownies

These are the BEST fudgy brownies!

Ok, I know this is going to be hard to believe for brownie lovers, like me, who are ever in search of the perfect brownie recipe. But I think I finally have my favorite for a basic fudgy brownie. No cream cheese here, no peanut butter, no additional exotic flavors…just good old-fashioned chocolate nuttiness. And the best part…no expensive or hard-to-find chocolate required. And since this recipe is made from scratch and standard pantry/fridge items, you don’t have to remember to pick up a mix to have these decadent chewy morsels any night of the week. The process is simple too: all you need is a bowl and whisk.

You won’t BELIEVE how basic this recipe is:

  1.  2 eggs
  2. 1 cup granulated sugar
  3. 1/2 cup (1 stick) butter, melted (I use salted or unsalted, whatever I have on hand)
  4. 1/2 cup all purpose flour
  5. 1/3 cup Hershey’s Cocoa powder
  6. 1/4 tsp salt
  7. 1 or 2 tsp vanilla extract (use ONLY real vanilla extract, makes a big difference)
  8. 1 cup chopped walnuts or pecans

 Method:

  1. Butter or spray with baking spray an 8” x 8” baking pan, or you can also use an 8” pie dish for these if you want to serve the brownies in pie shaped wedges.
  2. Heat oven to 350 degrees ( I like my brownies a little under-baked, so my trick is to bake these in a slightly cooler oven, 325 degrees).
  3. Beat eggs; blend in sugar and melted butter. Stir in flour, cocoa powder and salt. Add vanilla extract and chopped nuts.
  4. Pour into a prepared pan. Bake 25 to 30 minutes or until ALMOST set. Brownies will not test done in center. Cool for a few minutes, or as long as you can stand to wait; cut into squares or wedges. Serve warm with ice cream or whipped cream. Serves 6 to 8, depending on how generously brownies are cut.

 Recipe can be doubled if preparing for a larger group.

Enjoy! And let me know what you think.